Beauty
From Natural to Glam: 3 Makeup Tutorials for Beginners.

Unlike the stereotype for many years before now that makeup was used by women who are not beautiful to make themselves look, and feel beautiful, makeup is an excellent tool used by beautiful women to enhance their facial features.
It is also used to express their creativity and boost their confidence. So, it does not matter whether you are a beginner or not, all there is to do is to learn the basics and you are good to go.
In this article, we will run you through different ways to do your makeup well as a beginner.
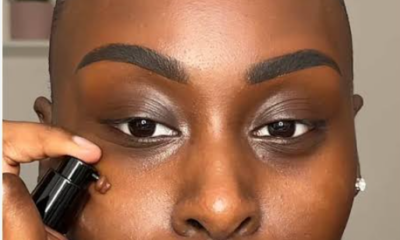
Makeup for Dark Skin.
If you are a dark skin girlie, it is important that you know how to do your makeup in a way that will maintain your skin tone when you are done. Here is a step by step tutorial on how to do your makeup as a dark skinned girl.
- Hydrate your skin and let it get absorbed for a few minutes.
- Go in with your moisturizer.
- Rub your primer. This is to enable your makeup to last longer without cracks.
- Note to let it sit for a few minutes.
- Use a liquid highlighter to get an extra glow. However, this is optional.
- Go in with your foundation and blend it into your skin. with your beauty blender.
- Lock it in with a setting spray.
- Contour the face, then go in with the blush. You can use your eye shadow palette for the blush.
- Use a concealer to highlight the face.
- Blend in the concealer and then contour the nose to give it a perfect look.
- Apply concealer under the eyes to make it more highlighted.
- Apply extra blush on your cheekbone and set with a setting powder.
- Set the rest of the face with an oil control powder.
- Enhance our brows by using an eye pencil to carve your desired shape.
- Apply any shade of eye shadow of your choice.
- Use mascara to define those eyes.
- Use a lip liner to line your lips, apply lipstick of your choice and gloss your lips.
- Set with a setting spray and you are good to go.
You can watch a more detailed video, below.
Read Also: Celebrity Makeup Inspiration: 5 Stunning Looks to Try
Befitting Birthday Bash Look.
Do you have to attend a friend’s birthday bash and do not want to look odd because you can’t do your own makeup? Then,this tutorial is for you. Below is a guide on how to do your own simple makeup to attend any event that you were invited to.
- Do your brows. This is because your brows tend to slip so it is easier to do it when there are no products on your face. Go in with a concealer that matches your skin tone after drawing your brows to lock it in and define the brows more.
- Do your eyeshadow. Doing this before continuing with the rest of your face prevents particles of the eyeshadow from falling to your already made face.
- Fix your eyelashes.
- Go in with your primer.
- Apply your foundation.
- Contour your face to give it some shadow. It is advised to use a shade of contour two or three shades darker than your foundation.
- Conceal your under eye and the T zones of your face then slowly blend it in.
- Set all of these products on your face using a setting powder.
- Go in with a bronzer.
- Use a powder to lock it all up.
- Set with a setting spray and use your mascara.
- Line your lips with a lip liner, go in with any color of lipstick for your choice then gloss your lips.
There’s a detailed video below. You can watch for more guidance.
Everyday Makeup Look.
Whether you are on your way to school, or work, you do not have to carry your face around bare and without makeup.
Here is a simple tutorial on how to do simple everyday makeup.
- Go in with your foundation.
- Contour your under eye.
- Brush your eyebrows to shape.
- Set with a setting powder. Start with your under eye and move to the T zones from there.
- Go in with a bronzer.
- Apply blush on your cheek bones and blend.
- Lightly line your lips and gloss it.
- Let it set in using a setting spray and allow to dry.
- Apply mascara to make your lashes more defined.
And you are good to go. You see how easy that is?
You see, doing your makeup is not asq difficult as you think. Whether you want to attend an event or just need to go on a casual outing, all you need to know are the basics of makeup and you are good to go.
I hope this helped you.


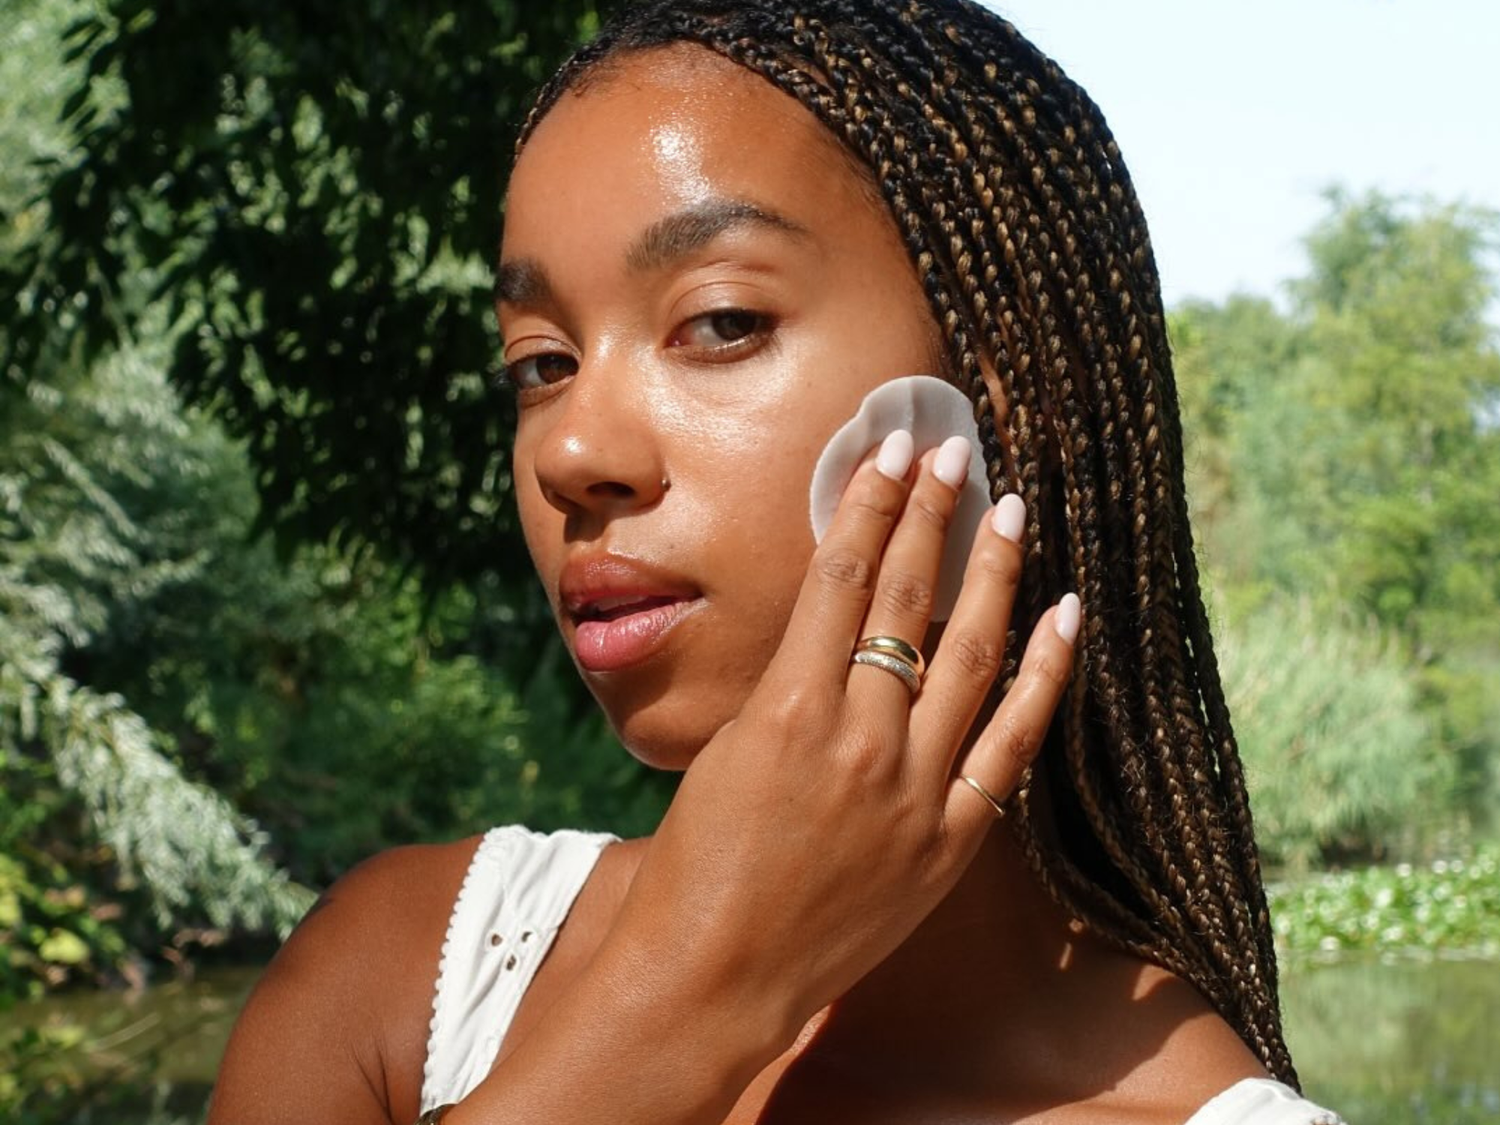
If your skincare shelf doesn’t have toner pads on it yet, you’re really missing out on one of the easiest ways to improve your routine. These small, soaked cotton discs have taken over bathroom cabinets everywhere, and once you understand what they actually do, you’ll get why so many people never skip them.
Toner pads are basically what they sound like, pre-soaked pads filled with toner that you swipe across your face, no pouring into your palm, no digging through a bag of loose cotton rounds. The formula inside each pad determines what it can do for your skin, from hydration and soothing to exfoliation and brightening.
Toner pads help rebalance your skin right after you clean it. Washing your face, especially with certain cleansers, can leave your skin’s pH a little off, so the pads bring things back to where they should be while also getting your skin ready to soak up whatever comes next, your serum, moisturizer, anything. This is where something like the Torriden Balanceful Toner Pad does really well, made with centella asiatica extract so it calms your skin right after washing.
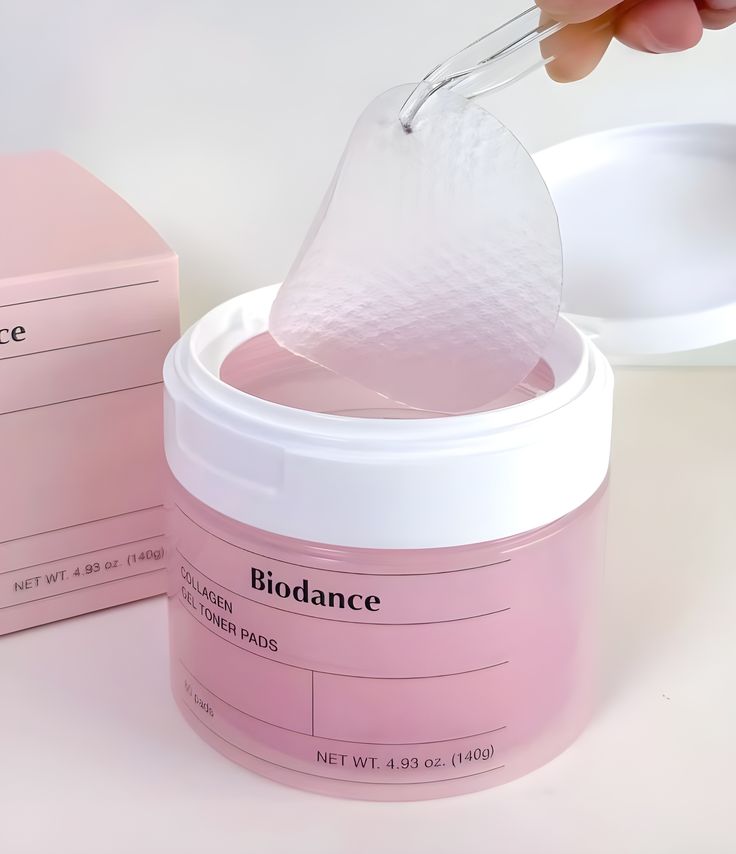
Photo: Pinterest/@Bibi
Getting enough hydration is another big reason people turn to toner pads. Some, like the Biodance Collagen Gel Toner Pads, are soaked in a gel-like liquid that leaves your skin feeling plump almost immediately, which works well if your skin often feels tight or dry after washing since the ingredients like collagen can help give skin a smoother, more hydrated appearance
Then there are the pads made for brightening and evening out skin tone. The Anua Niacinamide 5 TXA Brightening Pad works a bit differently from the rest, it’s shaped like a half-moon and made specifically for the under-eye and cheekbone area, the spots that dry out and dull first. You leave it on for 10 to 20 minutes like a mini mask before wiping it in, and the niacinamide and TXA combo goes to work on dark circles and uneven tone right there.
If you want something stronger for vitamin C, the Medicube Deep Vita C Pad is worth trying too, the pads are noticeably thicker and more soaked than most, delivering vitamin C-infused formula with every swipe, great for anyone hoping for a clearer, more glowing look.
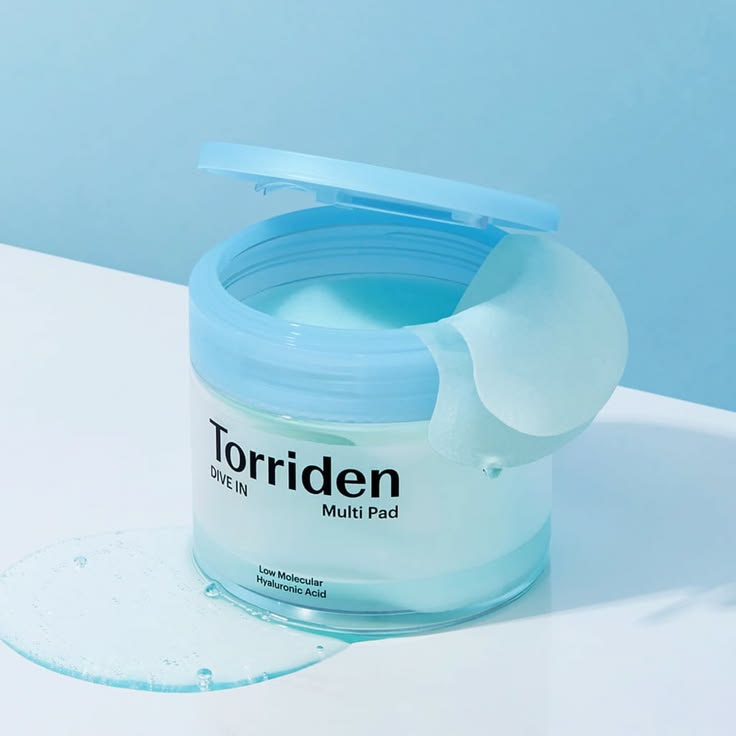
Photo: Pinterest/@Joobeauty.fr
Convenience is a huge part of why toner pads became so popular. No toner spilling all over your sink or dressing table, no guessing how much cotton to use, barely any waste. You open the jar, take out a pad, and you’re done, which is exactly why it works so well for anyone who travels a lot or just wants a routine that doesn’t take thinking.
They’re also great for light exfoliation. Many toner pads have a slightly rough surface, sometimes with tiny ridges or bumps, so they lift away dirt and buildup that a regular toner splashed onto your hands would probably miss, sloughing off dead skin along the way and leaving things smoother underneath.
After cleansing, take a pad and gently sweep it over your face while avoiding your eyes. Some people like to press the pad down for a few seconds first so the product sinks in before wiping. Just don’t rub too hard, your skin isn’t a floor you’re scrubbing, gentle strokes do the job better anyway.
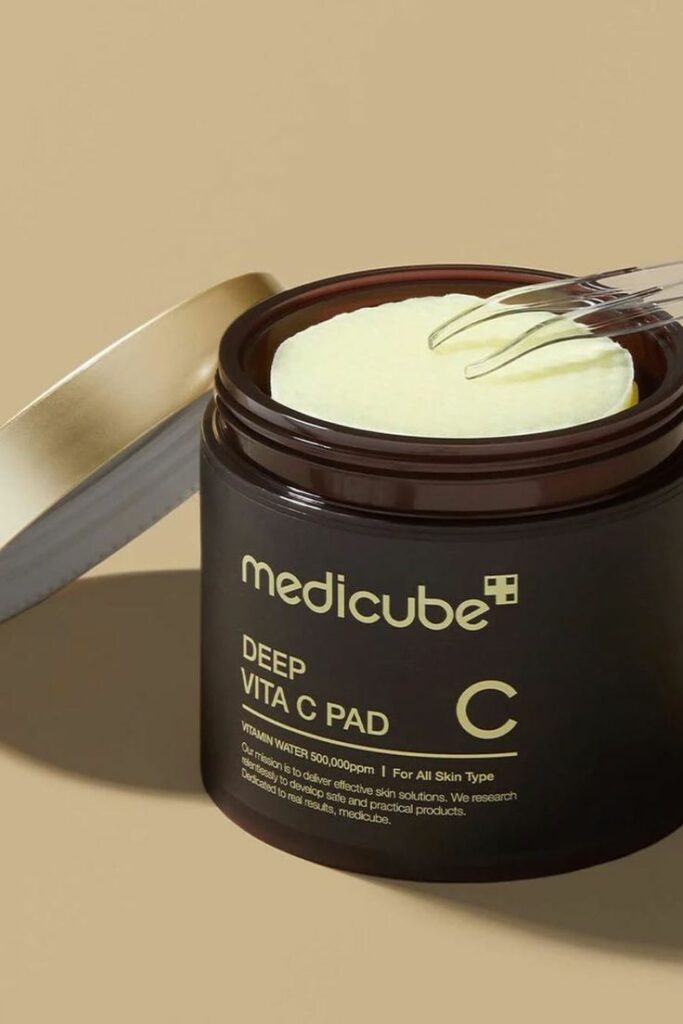
Photo: Pinterest/@Glowbeautyguide
You can use toner pads morning and night depending on the type, but if yours contains exfoliating acids or stronger treatment ingredients ease into it. Two or three times a week is a safer starting point until your skin adjusts, then you can build up from there once it’s tolerating it well.
Not every toner pad works for every skin type, so if your skin is sensitive or breaks out easily, go easy on pads loaded with strong actives since they can trigger irritation or redness if you overdo it. One thing worth doing before you try anything new, dab a little behind your ear or on your inner arm first and wait a bit, that way you know how your skin will react before it ever touches your face.

Rain in Nigeria doesn’t send a warning text before it falls. You could be looking your absolute best, and by the time you get to work, your hair has a completely different opinion. This is the reality every rainy season, and it’s why so many women start thinking ahead about what to lay their head down for once the clouds start gathering. Not every hairstyle can survive a sudden downpour, and honestly, some styles were just never built for this kind of weather.
Here’s a rundown of styles that actually stand a chance against the rain, and still look decent by the time you get home.
Knotless Braids
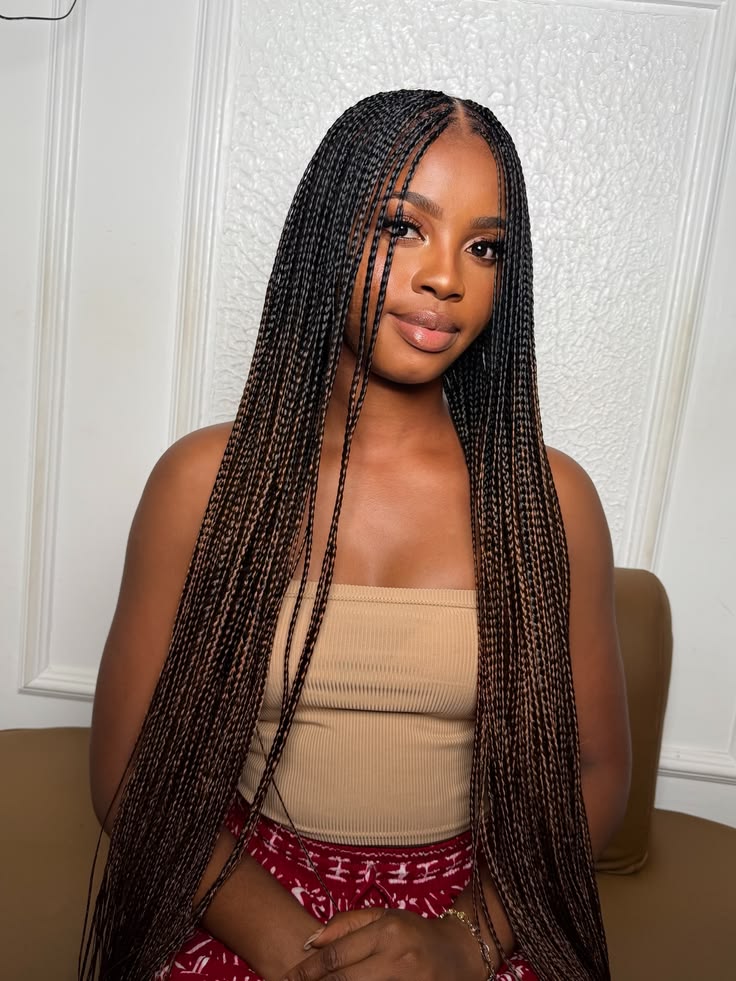
Photo: Pinterest
Knotless braids are lighter on the scalp than the regular knotted type, so your edges don’t feel like they’re being pulled all day, wet weather or not. The hair is fed in little by little instead of tied off at the root, which leaves less bulk sitting there to trap water. People also love how natural they feel on the head, comfortable enough to wear for weeks without your scalp screaming for a break.
stitch braids
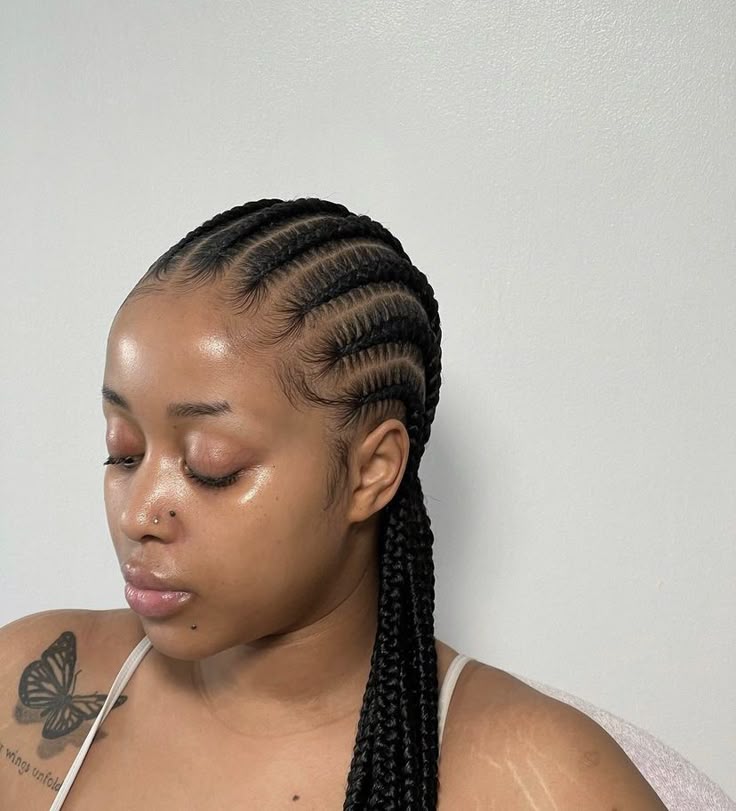
Photo: Pinterest
There’s something about stitch braids that just looks intentional, almost too neat to be real. They sit flat against the scalp with very little hair actually showing at the root, which leaves rain with almost nothing to work with.Their close-to-the-scalp design helps them maintain their shape, although how long they last also depends on proper installation, maintenance, and natural hair growth.
Senegalese Twists
Photo: Pinterest
If you want something that can also handle a splash of rain, senegalese twists are worth trying. The extension hair used is silky and smooth, twisted into neat rope-like strands that just don’t puff up the way curlier textures tend to. They generally maintain their appearance better than many loose hairstyles after light rain. They can also stay in for weeks, so you’re not thinking about your hair every other day while the rain keeps coming.
Classic Box Braids

Photo: Pinterest
Skip the curly or wavy ends this season and go for straight box braids instead. Straight synthetic hair simply doesn’t hold onto water the same way the curly kind does, so your braids won’t look soggy or swollen after a downpour. Plus, box braids give you room to play. Pack them up, let them down, do whatever, and they’ll still survive whatever the sky throws at you.
Straight Back Cornrows
Photo: Pinterest
This one is an oldie but a goodie. Straight back cornrows hug the scalp so tightly that their close-to-the-scalp design helps them hold their shape better than hairstyles with loose hair in wet weather. There’s no loose hair hanging about to soak up water and frizz. Our mothers wore this style for a reason, and it still holds up today, decades later, simply because it does exactly what it’s supposed to do.
Faux Locs
Photo: Pinterest
Not all faux locs are created equal, and this matters a lot when the rains are around. Go for the thicker, tightly wrapped ones rather than the lighter crochet kind, which tends to fray at the ends once it’s been wet a few too many times. A properly made set of faux locs can survive a quick shower without a problem, and honestly, they can hold their shape for weeks with barely any upkeep.
If there’s one thing all these styles have in common, it’s that they require minimal daily styling and generally hold up better in wet weather than loose hairstyles. That’s really the whole secret. So before the rain catches you off guard again this season, maybe it’s time to try one of these and stop stressing over what the weather will do to your hair.
Face yoga is a skincare routine that shouldn’t be neglected. It is simple, inexpensive, and easy to do at home while watching TV or getting ready for bed. More people are becoming interested in natural ways to care for their skin, especially around delicate areas like the eyes and lips where fine lines tend to appear first.
Now, face yoga is not a magic fix. It will not erase deep wrinkles overnight. But when done consistently, it can help improve circulation, relax tension in the face, and soften expression lines that build up over time. It’s like stretching and strengthening exercises, but for your face.
Photo
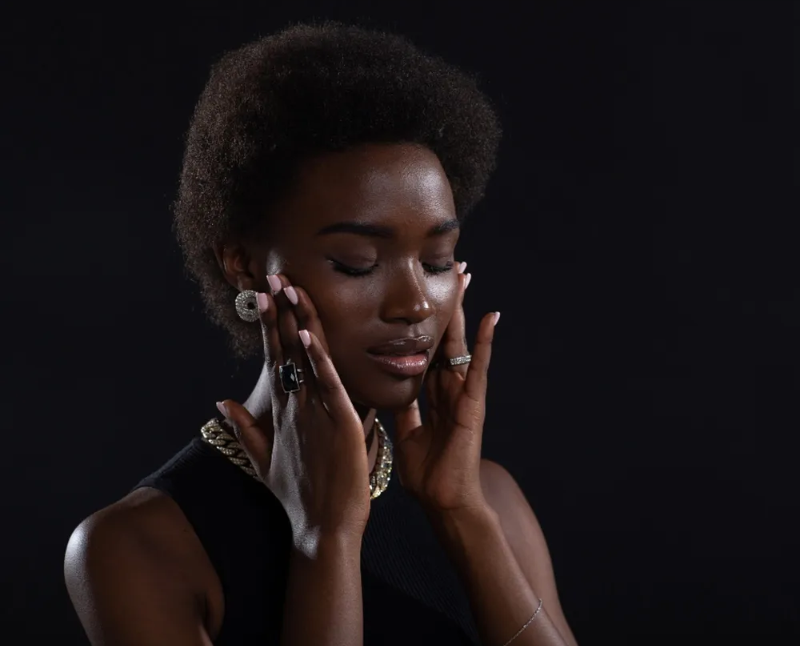
Photo: Freepik
One thing many people do not realize is how much tension we hold around the eyes and mouth. Squinting at screens, frowning while concentrating, sipping through straws, and even stress can all contribute to fine lines. Face yoga focuses on releasing some of that tightness while encouraging gentle muscle movement.
For the eye area, a simple exercise involves placing your index fingers lightly at the outer corners of your eyes. Gently squint your lower eyelids upward while keeping your forehead relaxed. Hold for a few seconds, then release. This movement helps engage the muscles around the eyes without pulling harshly on the skin. The key is to be gentle. Tugging too hard can actually irritate the delicate area.
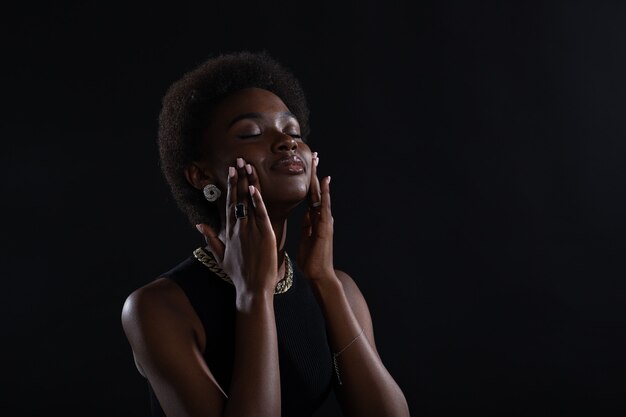
Photo: freepik
Another easy one is the eyebrow lift. Place your fingers just under your brows and gently push upward while slowly closing your eyes. Hold for a few seconds before releasing. This can help reduce heaviness around the eyes and ease tension from constant screen time.
The lip area deserves attention too. Fine lines around the mouth often develop from repetitive movements and dryness. One popular face yoga exercise is the “O” shape technique. Form your lips into a soft “O” shape, then smile gently while keeping the shape intact. You will feel the muscles around your mouth working. Repeat this several times slowly.
Cheek lifting exercises can also help support the area around the lips. Try smiling with your lips closed while placing your fingertips lightly on the tops of your cheeks. Lift the cheeks upward gently and hold for a few seconds.
Hydration also plays a major role here. Face yoga works best when paired with good skincare habits. Dry, dehydrated skin tends to show lines more easily. A nourishing moisturizer, sunscreen, and enough water can make a noticeable difference over time.
It’s important to note that face yoga doesn’t give instant results after two days. Face yoga is more like going to the gym. You start seeing changes gradually with regular practice. Even five to ten minutes a day can be enough to build a routine.


Everything You Need to Know About Toner Pads

Laura Ikeji Proves Polka Dots Are Back and Better Than Ever

Tems to Executive Produce Children of Blood and Bone Soundtrack

Davido Unveils Oriadé Tracklist Featuring Black Sherif, Aya Nakamura and Leon Thomas

“Clarissa” Brings a Nigerian Adaptation of Mrs Dalloway to Cannes Film Festival

Genevieve Nnaji Returns to Screen in BBC Drama Series “Wahala” Alongside Adelayo Adedayo & Cush Jumbo

Nike and Slawn Unveils Nigeria’s 2026 World Cup Collection.

Inside Nancy Isime’s 5 Skincare Tips for Women in Their 30s

Tiwa Savage Reveals Why Her Private Video Was Leaked.

5 Nollywood Films to Watch This Weekend.

The Dangers of Adult Skincare Products for Children and Teens.

New Music to Kickstart Your Week From Victony, Timaya, Duncan Mighty, Mr Eazi & Fave.


-

 Music2 months ago
Ayra Starr’s “Tornado” Video Enters an Unbelievable New World.
-

 Celebrity Style2 months ago
Dede Ashiogwu Puts Y2K Nostalgia Back on the Radar
-

 Celebrity News1 month ago
DJ Cuppy Explains Why She Cannot Marry a Nigerian and Reflects on Her Past Relationships.
-

 Netflix1 month ago
‘The Polygamist’: Nigerians Weigh In on Netflix’s New Series.
-

 Lifestyle2 months ago
Celebrate Father’s Day with the Ultimate Gift Guide for Dads.
-

 Big Brother Naija2 months ago
Big Brother Naija Reunion 2026: Drama Unfolds Between Kola, Big Soso and Others.
-

 Lifestyle2 months ago
Dotun Popoola Turns Waste Into Art in Reclaimed Beauty.
-
 Celebrity News2 months ago
Ayra Starr Is the Cover Girl for Schön Magazine
-

 Celebrity Style2 months ago
Ankara Is Anything But Boring — And Mercy Eke Has The Receipts
-

 Celebrity Style2 months ago
Dede Ashiogwu in Ewongho Shows a Different Side of Head-to-Toe Denim